Lesson Planning with Me

Hello! I teach an integrated preschool classroom, which means I am responsible for students ages three to five with special needs of all types as well as typical developing students. My students range in ability from a toddler to a typical kindergartener. Therefore, my activities must be able to reach a wide range and be easily adjusted for multiple ability levels.

I created this blog as a way to keep track of the fantastic ideas I have gathered over the years. Because I just randomly add activities to the blog, use the search, standard list, or theme list on the left side to find the activities you are after!

I also create and sell resources that can be found at TeachersPayTeachers and Teacher's Notebook.

Wednesday, January 23, 2013

Sight Word and Letter Pounding

From I Can Teach My Child:


Letter & Sight Word Pounding


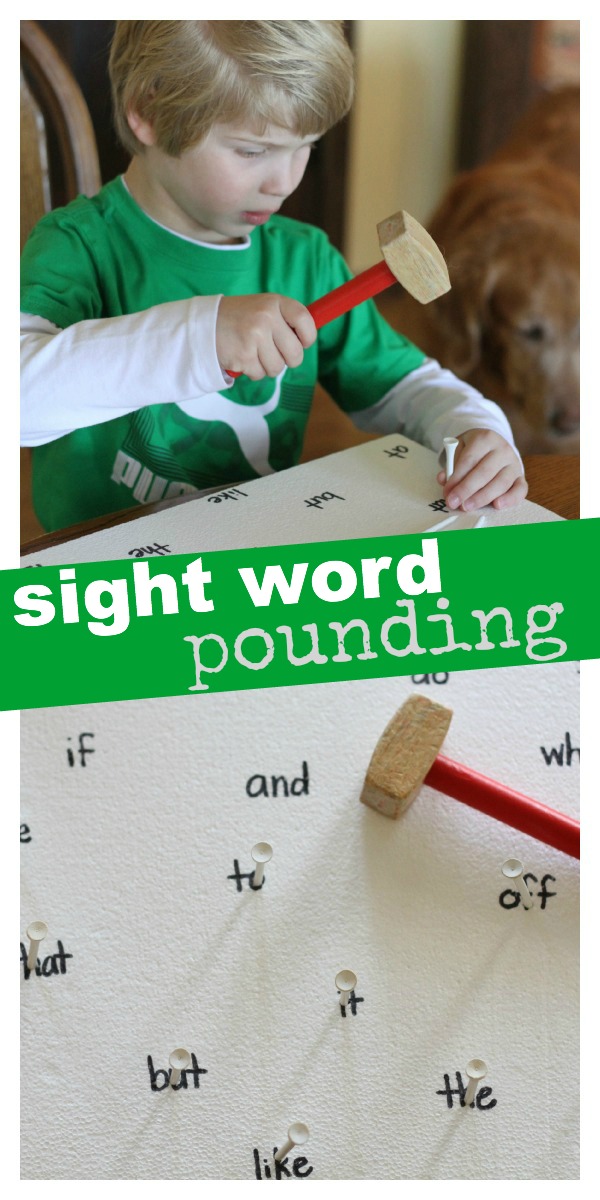
Here’s what you’ll need:  a piece of styrofoam, golf tees, a permanent marker, and a toy hammer.  

IMG_7927


IMG_7928
 1.  Begin writing letters or sight words (or even numbers & shapes) on your piece of styrofoam.  I chose to do capital and lowercase letters for Little Brother.  He didn’t recognize many of them but it was an opportunity for me to work with him at identifying these letters.


IMG_7929


IMG_7930
 2.  Gather your mallet/hammer and golf tees.  Set the styrofoam in front of your child.  Please note:  If your styrofoam isn’t very thick, I would recommend putting a foam placemat (or some type of protection) underneath.


IMG_7933
 3.  Give your child the mallet/hammer and ask him/her to say each word (or letter) as they place the tee into the foam.


IMG_7935
Psst…this is great for fine motor control as well!

Tuesday, January 22, 2013

Snowman in a Bag

From Teach Preschool:

Snowman in a Bag by Teach Preschool
This process is similar to our snowman in a bottle but if you didn’t have a bottle on hand, then gather up a baggie, some buttons, a snowman nose, and some snow and you are all set to go…
Snowman in a Bag by Teach Preschool
Place just just a couple of large spoon fulls of snow is all you need in the bag and then lay the bag flat.  Press and pack the snow so it stays flat and then arrange your button eyes and nose on the snow to make a snowman face.  Press the buttons and nose firmly into the snow…
Snowman in a Bag by Teach Preschool
Tape the snowman in a bag to a window so it can get some sunlight and let the melting begin…
Snowman in a Bag by Teach Preschool
Here’s what my snowman looked like after about 30 minutes…
Snowman in a Bag by Teach Preschool
And after about 1 hour…
Snow Activities 042
After about 1 hour 30 minutes…
Snowman in a Bag by Teach Preschool
And about 2 hours later…
Snow Activities 064
A very simple way to explore the melting of snow. Did you notice that bag seems much less full with the snow melted than before? And did you notice that the nose floats but the buttons sink?  And did you notice that snowman moved down the bag as it melted?  And did you notice that all that is left of the snowman is a bag of water?
Snowman in a Bag by Teach Preschool
If you want the printable to go with the snowman in a bag, just click here: Snowman Science by Teach Preschool


Thursday, January 3, 2013

Fun ways to use alphabet books found at Mr. Printables.


printable alphabet book

Magnet Board Stories/Activities/Songs etc.

  Some of the cutest little pre-made manipulatives for favorite songs from Serving Pink Lemonade!


Zoo Pack

Zoo Printables
Cute, cute, cute


Bear Snores On Printables

Groundhog's Day

From All Kids Network:


What you'll need:
  • Groundhog Template
  • Brown paint
  • Black construction paper
  • Lightweight cardboard (old cereal boxes work well here)
  • Toothbrush
  • Scissors
  • Glue stick
  • Brass brad
  • Optional small hole punch
How to make your Groundhog Shadow Craft
  1. Print our groundhog template. Cut it out and then glue it to a piece of lightweight cardboard to give it some strength.
  2. Let your child paint the groundhog brown with a toothbrush.
  3. Once the groundhog is dry, cut it out of the cardboard piece.
  4. Print the template out again. Cut it out and trace it onto a piece of black construction paper and cut that out as well. The black groundhog piece will be his shadow.
  5. Lay the groundhog’s shadow under the painted groundhog and push a brad through towards its tail-end.

Hibernation

Found this poster at My Montessori Preschool.


A great site for some animals that hibernate: